Icon support for custom Windows Workflow activities
Creating a custom dependency resolution activity for WF gave me the opportunity to learn a lot about the latest version of Workflow Foundation. Adding support for custom icons is a simple requirement that often came up when creating new activities.
There are two places that provide this icon support. The first is in the Visual Studio toolbox and the second is on the activity design surface. I have been using images from the awesome famfamfam Silk collection for these activities.
Visual Studio toolbox
Adding an icon to the toolbox is done using the ToolboxBitmapAttribute on the activity class.
[ToolboxBitmap(typeof(ExecuteBookmark), "book_open.png")]
public sealed class ExecuteBookmark : NativeActivity
This attribute needs to identify the image file and a type reference that the IDE uses to locate the image. In the above scenario, the book_open.png file is the image to use for the toolbox. The image file in the project needs to have its Build Action property set to Embedded Resource.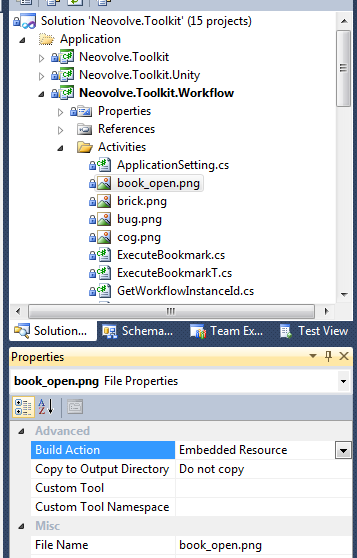
The IDE uses the type reference to determine the namespace used as the prefix of the image name in the assembly resources list.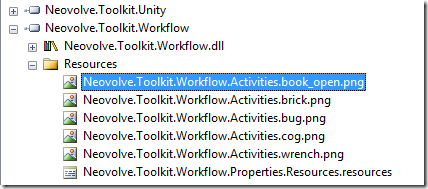
The IDE can then extract this image and use it in the toolbox.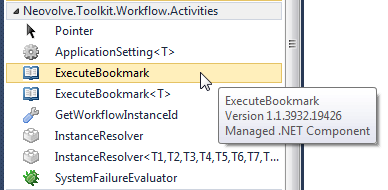
Workflow designer
The workflow designer support for custom icons has a similar layout as the toolbox icon. The image file for the designer should be co-located with the designer xaml file. While this file should be the same image as the toolbox image, the file must be a different file reference in the Visual Studio solution/project. Adding the image file as a link to the other file should work if you want to have only one physical file for the image.
The reason for the separate file is that the Build Action for the designer image must be set to Resource instead of Embedded Resource that the ToolboxBitmapAttribute requires. Using two files for this purpose should not be a big issue as the designers are typically located in a separate *.Design.dll assembly (see here for the details).
The XAML in the designer for the activity then references this image file.
<sap:ActivityDesigner x:Class="Neovolve.Toolkit.Workflow.Design.Presentation.ExecuteBookmarkDesigner"
    xmlns="http://schemas.microsoft.com/winfx/2006/xaml/presentation"
    xmlns:x="http://schemas.microsoft.com/winfx/2006/xaml"
    xmlns:sap="clr-namespace:System.Activities.Presentation;assembly=System.Activities.Presentation"
    xmlns:sapv="clr-namespace:System.Activities.Presentation.View;assembly=System.Activities.Presentation">
    <sap:ActivityDesigner.Icon>
    <DrawingBrush>
        <DrawingBrush.Drawing>
        <ImageDrawing>
            <ImageDrawing.Rect>
            <Rect Location="0,0" Size="16,16" ></Rect>
            </ImageDrawing.Rect>
            <ImageDrawing.ImageSource>
            <BitmapImage UriSource="book_open.png" ></BitmapImage>
            </ImageDrawing.ImageSource>
        </ImageDrawing>
        </DrawingBrush.Drawing>
    </DrawingBrush>
    </sap:ActivityDesigner.Icon>
</sap:ActivityDesigner>
The designer should then be associated with the activity. This is done using a class that implements IRegisterMetadata so that there can be a separation of the activity assembly and the design assembly. Again, see this post for the details.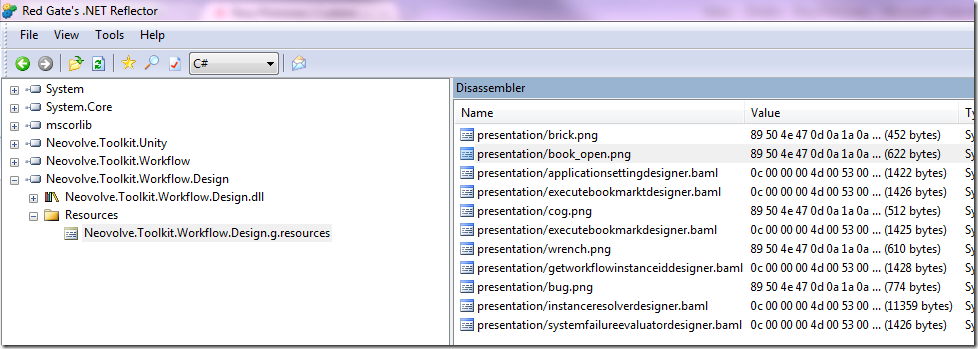
The designer will look at the design assembly and extract the image from the resource list. This image will then be used on the design surface.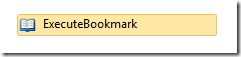
The only other thing to keep in mind is that the design assembly must be co-located with the activity assembly in order to leverage the design-time experience provided by the custom activity designers.